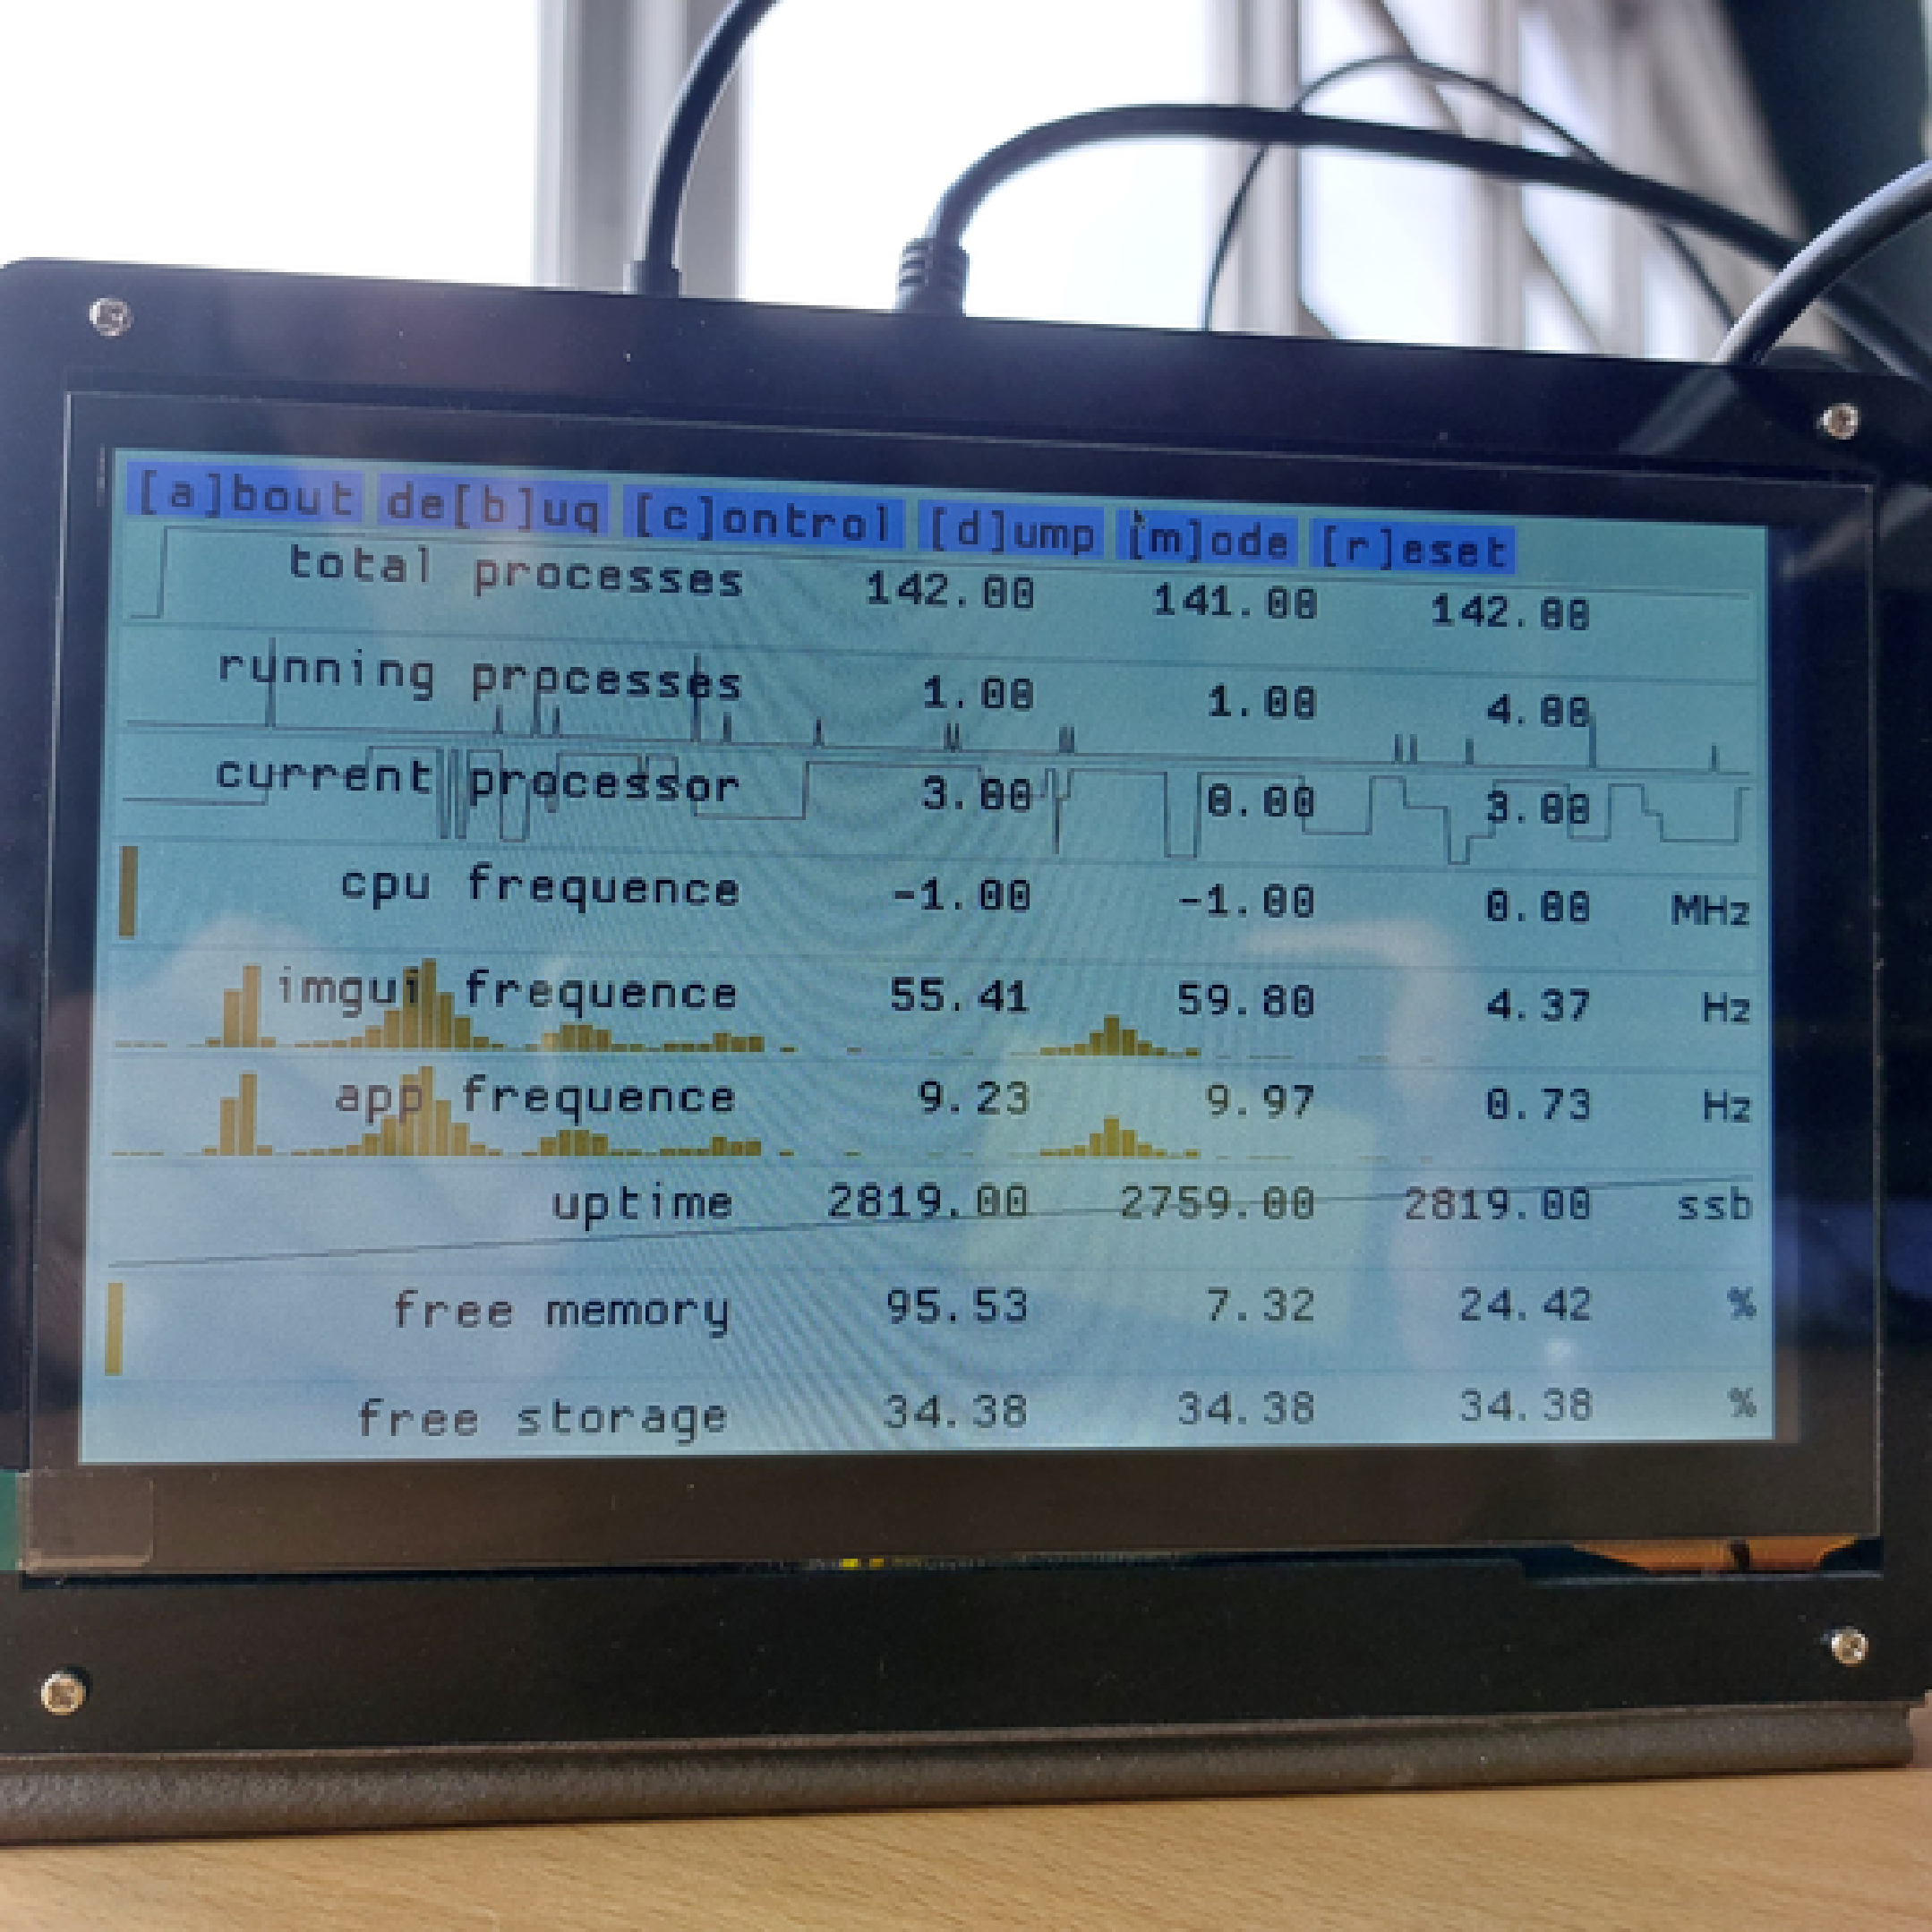
Figure 1: Raspberry π - 4 - model B behind a Kuman Capacitive 7”
touchscreen TFT LCD module
These interactive instructions[6] follow the configuration and build of a Linux-based operating system (OS) for Raspberry π[9]. The goal of the project is a compact and deterministic OS with a running graphical user interface (GUI) system performance monitor application[7]. Standard command-line interface (CLI) tools ensure device remote access and control. The build is done with Yocto[11].
There are several steps organized in corresponding sections as follows. Read in Section 2 how to fetch metadata. Section 3 shows how to configure the OS build. In Section 4 learn how to build the OS image and see how to copy image to SD card in Section 5. Section 6 is dedicated to post-install issues like the configuration of the WiFi interface from the command line.
In current context, metadata is a set of instructions to build targets. The build configuration is managed via files with extension conf. They define configuration variables to control the build process.
Basic concepts needed to understand metadata structure follow.
The instructions are organized as recipes in files with the bb extension. There are also files with the bbappend extension designed to modify recipes and bitbake classes with the suffix bbclass for instructions shared between recipes. See a full list of metadata file types in Table 2.
The target may be a software (SW) package or group of packages. The target may also be a complete OS image.
Metadata is organized in layers. Layers logically separate information of a project. Table 1 presents OpenEmbedded[3] metadata layer types.
The complete list of github SW metadata repositories used in this project includes Yocto layers, the Raspberry π board support package (BSP) layer, a SW layer with custom recipes including target and distribution definitions, and the build configuration itself.
In short, users fetch metadata in contrast to the real data fetched later during the OS build. See Section 4 for details. It means that users decide where to store fetched metadata. It is nice to have all layer sub-directories in one system location. In these instructions it is referred as <META-DIR>. The second directory to create is the <BUILD-DIR>. This is where the build and the build configuration live. I suggest that <BUILD-DIR> is not inside <META-DIR> to not mix data and metadata.
| layer type | contents |
| base | base metadata for the build |
| machine aka BSP | hardware (HW) support |
| distribution | policy configuration |
| SW | additional SW |
| miscellaneous | do not fall in upper categories |
| file type | extension | purpose |
| recipe | bb | SW build instructions |
| recipe | bbappend | SW recipe modification |
| class | bbclass | shared instructions |
| config | conf | build directives |
| config | inc | shared build directives |
Following the OpenEmbedded metadata classification, meta-thc is a SW layer as there are SW recipes. On the other hand, it is a distribution layer because it defines a new distribution based on poky. See <META-DIR>/thc/meta-thc/conf/distro/thc.conf. In addition, there is an image recipe to build a target in <META-DIR>/thc/meta-thc/recipes-core/images/core-image-thc.bb.
This allows for an effective isolation of machine, distribution and image features of the OS. The layer includes also shell scripts to clone metadata and to export the OS image on SD-card. These may be found in <META-DIR>/thc/meta-thc/bin. Learn more in following sections. See next the contents of meta-thc. The system location of the layer is <META-DIR>/thc/meta-thc by default.
.
 bin
  metafetch.sh
 classes
  thclass.bbclass
 conf
  layer.conf
 README
 README.md
 recipes-core
  dhcpcd
   dhcpcd_9.4.1.bbappend
  init-ifupdown
   init-ifupdown_1.0.bbappend
  thcp
      thcp
       imgui.ini
       rpip
       wifini.sh
      thcp_0.1.bb
 recipes-sw
     glfw
      glfw_3.3.8.bb
     imgui
         imgui_0.1.bb
There is a shell script to clone all metadata from public github repositories. It may serve people to build their own OS for Raspberry π. The script performs metadata fetch, the bitbake initialisation and a simple metadata verification.
#!/bin/sh
# name:    metafetch
# purpose: clone rpi metadata
# code:    kaloyansen@gmail.com

FETCHER=https://github.com/
GITFETCHER=git@github.com:
BRANCH=kirkstone

LONGSFX=$(head -c 1000 /dev/random | tr -dc ’a-z’)
SFX=$(expr " $LONGSFX" : ".*\(.\{3\}\)")
unset LONGSFX

DEFMETADIR=$HOME/yocto/$SFX/metadata
DEFBUILDIR=$HOME/yocto/$SFX/rpi4

TARGET=core-image-thc

XNAME=$(basename $0)

say() { printf ":: $XNAME :: $*\n"; }
die() { say $* && exit 0 || kill $$; }
use() {    # print options and quit

    printf "
usage:
\t $XNAME <options>
    option        \t purpose                 \t default
    -h            \t print this              \t usage
    -d            \t dry run                 \t wet run
    -g            \t switch to git protocol  \t https protocol
    -r <branch>   \t branch                  \t $BRANCH
    -m <metadir>  \t metadata directory      \t $DEFMETADIR
    -b <buildir>  \t build directory         \t $DEFBUILDIR

"
    die
}

confirm() {    # get confirmation or quit

    read -p "please confirm (y/n) " choix
    [ "$choix" == "y" ] && say confirmed || die
}

[ "$SFX" ] || die try again

while getopts ":m:b:r:hgd" option; do    # parce command-line options

    case $option in

        m ) METADIR=$OPTARG;;
        b ) BUILDIR=$OPTARG;;
        r ) BRANCH=$OPTARG;;
        g ) FETCHER=$GITFETCHER;;
        d ) DRYRUN=yes;;
        h ) use;;
        * ) use;;
    esac
done

# check system path
[ "$METADIR" ] || METADIR=$DEFMETADIR
[ "$BUILDIR" ] || BUILDIR=$DEFBUILDIR
[ -d $METADIR ] || mkdir -p $METADIR || die $? cannot create $METADIR
[ -d $BUILDIR ] || mkdir -p $BUILDIR || die $? cannot create $BUILDIR
METADIR=$(realpath $METADIR) && say "metadata:\t $METADIR" || die $? cannot find $METADIR
BUILDIR=$(realpath $BUILDIR) && say "build:\t $BUILDIR" || die $? cannot find $BUILDIR
say "branch:\t $BRANCH"
say "protocol:\t $FETCHER"

declare -A REPO
REPO=(    # associative git repository array
    [yoctoproject/poky.git]=$METADIR/poky
    [openembedded/meta-openembedded.git]=$METADIR/oe
    [agherzan/meta-raspberrypi]=$METADIR/rpi/meta-raspberrypi
    [kaloyansen/meta-thc.git]=$METADIR/thc/meta-thc
    [kaloyansen/rpiconf.git]=$BUILDIR/conf
)

[ "$DRYRUN" ] || confirm

for repo in ${!REPO[@]}; do    # clone repositories

    command="git clone -b $BRANCH $FETCHER$repo ${REPO[$repo]}"
    say $command
    [ "$DRYRUN" ] || $command
done

[ "$DRYRUN" ] && die

# adjust bibtbake layer configuration
sed -i s#/home/yocto/layer#$METADIR#g $BUILDIR/conf/bblayers.conf || die sed $?

# bitbake environment initialisation
OEINIT=oe-init-build-env
cd $METADIR/poky && pwd || die $? cannot find $METADIR/poky
[ -f $OEINIT ] && . ./$OEINIT $BUILDIR || die $? cannot find $OEINIT

bitbake-layers show-layers

echo && say "how to start a new build"
printf "
cd $METADIR/poky
. ./$OEINIT $BUILDIR
bitbake $TARGET

"
Do not copy/paste metafetch. Download it here. Note the associative array REPO. It defines the remote and local system path of repositories. The script is designed in a way that after a successful run one may start a build with bitbake. Do not forget to grant permissions to make script executable. It takes <META-DIR> and <BUILD-DIR> names from the command-line. You may use next examples to run metafetch. Running the script without command-line options like the first example results in some default configuration. You may want to specify custom directories like the second example. Otherwise the script will use default values. The default github protocol is https but I recommend using secure shell (SSH) because it is an order of magnitude faster. You may need to export one SSH public key to your github account. Use the command-line option -g to switch protocol. The default git branch is kirkstone. Use -h to see all CLI options.
  chmod +x metafetch

  ./metafetch
  ./metafetch -m <META-DIR> -b <BUILD-DIR>
  ./metafetch -g
Build configuration is in <BUILD-DIR>/conf, check files local.conf and bblayers.conf. Yocto layers are specified in bblayers.conf. The build directives are in local.conf. Variables in this file control the build. Sometimes I call these directives to avoid repetitions. To not mix them, I have isolated target HW specific directives. Two possible targets are defined in <BUILD-DIR>/conf/raspberrypi4-64.inc and <BUILD-DIR>/conf/qemuarm64.inc. The host configuration is optional. See the bottom lines in <BUILD-DIR>/conf/local.conf for details. Note the difference between the optional include and not optional require. The latter will interrupt the build configuration if the corresponding file does not exist.
Directives control the build. It is not always easy to understand their meaning and their relations. For example, some directives change values of other directives. What is more, bitbake syntax is pretty complicated. In result, your life may become unbearable if the build configuration is too long. See next an alphabetical list of some important build configuration directives.
BB_DISKMON_DIRS This bitbake variable enables free storage space verification. Users may add rules to monitor as many directories as they wish. Of course, it makes sense to add only directories on different storage partitions. The directive contains rules to trigger actions in case of low storage space during builds. Possible actions are WARN, STOPTASKS and HALT. Rules are defined in the following format.
"<action>,<directory path>,<space left>,<inodes left>"
DISTRO This is the short name of the OS distribution. Yocto provides four variants of their reference distribution poky. See details in <META-DIR>/poky/meta-poky/conf/distro/poky*.conf. Some distribution dependent directive values are presented in Table 3.
DISTRO_FEATURES Distributions can select which features they want to support through the DISTRO_FEATURES variable, which is set in the distribution configuration file.
IMAGE_FEATURES This directive controls the contents of the OS image. Different predefined packages could be added, removed or modified via this variable. Useful examples for image features are allow-empty-password, allow-root-login, empty-root-password, post-install-logging, splash, package-management and ssh-server-dropbear.
IMAGE_FSTYPES This is another important directive. Here I have removed archived images to decrease the built time and added the wic format. One may want to use the wic command-line tool to list the partitions on a wic image. See how to copy it to an SD card in Section 5.
IMAGE_OVERHEAD_FACTOR This defines the free storage space on the root partition. Overhead factor of 2 means that the free space will be equal to the space already used by the OS. This will double the size of the image. The default value of 1.3 increases image size with 30%.
INHERIT This is a list of included bitbake classes. See Section 3.2.
INIT_MANAGER The OS init process could be sysvinit, systemd or mdev-busybox.
MACHINE No doubt, this is the most important directive, set here to raspberrypi4-64. You may want to change this value if you build an OS for a different HW. If you want to emulate Raspberry π on your host machine with qemu, set MACHINE to qemuarm64. I confirm that this works although I did not find this approach very useful to test a GUI.
MACHINE_FEATURES This directive controls machine features. It is set in the machine configuration file and specifies the hardware features for a given machine.
PACKAGE_CLASSES There are different package formats used in various Linux-based OS’s to distribute and manage programs. Both debian package format - deb and rpm from RedHat do well, but recently I had issues with ipk so I disabled it.
PACKAGE_INSTALL This is where to specify additional SW packages. This is useful for packages not included in the image by default. In my experience, the default OS has all necessary programs or compact alternatives. However this is the directive used to append imgui.
SANITY_TESTED_DISTROS This is a list of tested GNU is not UNIX (GNU)/Linux distributions. Using another distribution is not prohibited, but a warning messages is generated each time bitbake is run. One may want to append the host machine Linux distribution to get rid of this warning. See next examples for users of Manjaro and OpenSuse rolling releases.
  SANITY_TESTED_DISTROS:append = " manjaro"
  SANITY_TESTED_DISTROS:append = " tumbleweed-*"
TCLIBC The GNU standard C library variant to use during the build. Available options are glibc, musl, newlib and baremetal.
Find bitbake classes in <META-DIR>/poky/meta/classes. For example rm_work.bbclass defines a specific task for packages to remove intermediate files generated during the build. This decreases storage space about twice. Those who want to keep the working data and have enough storage space may comment the next line in local.conf.
Another class, extrausers.bbclass, is used with the directive EXTRA_USERS_PARAMS to manage OS users and passwords. In example, it may be useful to define a superuser password.
INHERIT:append = " rm_work"
| config file | INIT_MANAGER | TCLIBC | status |
| poky.conf | sysvinit | glibc | fine |
| poky-bleeding.conf | sysvinit | glibc | unknown |
| poky-altcfg.conf | systemd | glibc | unknown |
| poky-tiny.conf | mdev-busybox | musl | unknown |
It is very likely that you will need to install Yocto requirements[12] to be able to run bitbake. The list of Yocto sanity checked distributions currently includes poky-3.3, poky-3.4, Ubuntu-18.04, Ubuntu-20.04, Ubuntu-22.04, Fedora-37, Debian-11, OpenSUSEleap-15.3 and AlmaLinux-8.8. However, I do builds on Manjaro - a not officially supported GNU/Linux distribution - and it works fine.
Ensure that the following packages are installed.
git
tar
python
gcc
GNU make
Find more details in Yocto documentation at [12]. You may need to install in addition diffstat, unzip, texinfo, chrpath, wget, xterm, sdl, rpcsvc-proto, socat, cpio, lz4, gawk, findutils, crypt, mtools and inetutils. As a double check, make sure to have the following command-line tools on your host machine: chrpath, diffstat, lz4c, rpcgen, bash, bzip2, file, grep, patch, sed and mdir.
The complete list of packages to install on Manjaro includes git, tar, python, gcc, make, chrpath, cpio, diffstat, patch, rpcsvc-proto.
Fetched metadata requires only 412MB of free space. In contrast the OS build may need up to 30GB or even 50GB if intermediate files are kept. Read about the bitbake class rm_work in Section 3.
The primary build tool of OpenEmbedded based projects, such as Yocto is bitbake. To initialise bitbake build environment navigate to <META-DIR>/poky and source the initialization script like the next command.
source oe-init-build-env <BUILD-DIR>
The script changes the system path to <BUILD-DIR>. Next, you may want to run the following command to check project layers.
bitbake-layers show-layers
Alternatively, source the dedicated portable operating system interface (POSIX) script <META-DIR>/thc/meta-thc/bin/yoctoinit. First of all, uncomment the two lines in the script to define the system path to <META-DIR> and <BUILD-DIR>. In addition to the environment initialisation, the script defines some useful functions. Have a look at the code for details.
The target core-image-thc is a compact OS image with a X server and a running GUI system performance monitor[7] based on [2]. Run next command to build the OS.
bitbake core-image-thc
Unless your host machine is a supercomputer, this will take at least two hours. Find a list of tasks performed by bitbake for a typical SW package in Table 4. If a build is interrupted during a fetch task, this could be the connection with a server. A simple rerun of bitbake may solve this issue. If not, you may try rebuild the target responsible for the failure. See next how to do this.
bitbake <target> -c clean && bitbake <target>
The build happens in <BUILD-DIR>. Table 5 presents a list of important <BUILD-DIR> sub-directories.
Source archives are saved in the download directory. They are extracted, configured, compiled and installed in the work directory. Built packages are stored in the package directory. Finally, following the build configuration packages are unpacked to create the OS image found in the image directory. The build flow is summarised in Table 5.
| task | description |
| do_fetch | fetch the source code |
| do_unpack | unpack the source code |
| do_patch | apply patches to the source |
| do_configure | source configuration |
| do_compile | compile the source code |
| do_install | copy files to the holding area |
| do_populate_sysroot | copy files to the staging area |
| do_package | analyse holding area |
| do_package_qa | check quality |
| do_package_write_rpm | deploy SW package in rpm format |
| do_package_qa | quality checks on the package |
| name | location | description |
| configuration | conf | build configuration files |
| download | downloads | fetched SW source code archives |
| work | tmp/work | working directory |
| package | tmp/deploy/rpm | final SW packages in rpm format |
| image | tmp/deploy/images | boot files, kernels and images |
The OS includes a kernel ARM, 64bit boot executable image of 23MB, a Raspberry π configuration of Linux 5.15. This is a long - term support (LTS) kernel release. The total size of kernel modules is 21MB.
Yocto provides multiple package and image formats. Different ways exist to install images on SD-card. The OS has two partitions - /root and /boot. There are no swap and home partitions.
I recommend the classic command-line tool dd to copy data. It works fine with different image formats like rpi-sdimg, hddimg and wic. The last one is recommended. Find the SD-card device name, for example /dev/<xxx>, unmount it with umount if mounted, and do copy data with the next command.
dd if=core-image-thc-raspberrypi4-64.wic of=/dev/<xxx> status=progress
note 1: run this command in <BUILD-DIR>/tmp/deploy/images/ raspberrypi4-64
note 2: run this command with root privileges
note 3: be careful to not specify the device name of your hard drive (see note 2)
Alternatively, there is a dedicated POSIX shell script - <META-DIR>/thc/meta-thc/bin/burn. Use the command-line option -h for details. The transfer does not take long. When it is over, replace the card to Raspberry π and turn it on. That’s it.
Wireless connection is established via classic command-line tools like ip[1] and iw. The dynamic host configuration protocol (DHCP) client is udhcpc[1], and wpa_passphrase[10] stores WiFi connections. A dedicated POSIX shell script named wifini.sh is installed in /usr/bin, as well as a running GUI system performance monitor[7]. The application uses Dear ImGui[2] library and is configured to start automatically on boot.
#!/bin/sh
# name:    wifini.sh
# purpose: wifi connection
# code:    kaloyansen at gmail dot com
# require: wpa_passphrase, wpa_supplicant, ip, iw, grep, awk
# # # # # # # # # # # # # # # # # # # # # # # #

# files
MYNAME=‘basename $0‘
WPACONF=/etc/wpa_supplicant.conf
IFCONF=/etc/network/interfaces

# command-line tools
WPAPASS=/usr/bin/wpa_passphrase
IW=/usr/sbin/iw
WPASUPP=/usr/sbin/wpa_supplicant
DHCP=/sbin/udhcpc
IP=/sbin/ip

die() { echo $MYNAME $* && exit 0; }
say() { echo $MYNAME $*; }
auto() { # enable wifi connection on boot
    patch=auto\ $WIFACE
    say $patch
    grep "$patch" $1 > /dev/null || printf "
$patch
# wpa-roam $WPACONF

" >> $1;
}

[ "$USER" == "root" ] || die run with root privileges

# get wifi interface and network ssid
IWD=‘$IW dev‘
WIFACE=‘echo $IWD | grep Interface | awk ’{print $3}’‘
SSID=‘getopt s: $* | awk ’{print $2}’‘

say whoami: $0

[ $SSID ] && say network: $SSID || die specify network: $MYNAME -s SSID
[ $WIFACE ] && say interface: $WIFACE || die wireless interface not found

# verify connexion
echo $IWD | grep $SSID > /dev/null && die $SSID connected || say connecting $SSID

# up interface
$IP link show $WIFACE | grep UP > /dev/null || $IP link set $WIFACE up

# search network
$IW $WIFACE scan | grep $SSID > /dev/null || die cannot find $SSID

FINE=‘grep $SSID $WPACONF‘

# die debug $FINE

# 1. save network in $WPACONF
[ $FINE ] && say $SSID already configured || $WPAPASS $SSID >> $WPACONF

# 2. configure wifi to start on boot in $IFCONF
[ -f $IFCONF ] && auto $IFCONF || die $IFCONF not found

# 3. reboot
say reboot in six seconds   && sleep 3
say reboot in three seconds && sleep 2
say reboot in one second    && sleep 1
# yeah no kidding
reboot & die see you later || kill $$

# control files
WPASOCKET=/run/wpa_supplicant/$WIFACE

# process id files
WPAPID=/run/wpa_supplicant.$WIFACE.pid
DHCPID=/run/udhcpc.$WIFACE.pid

# recreate wpa socket
rm $WPASOCKET
$WPASUPP -B -D wext -i $WIFACE -c $WPACONF || say cannot create $WPASOCKET

# start a dhcp client
$DHCP -i $WIFACE || die $?

$IP addr show $WIFACE
$IW $WIFACE link
$IP route show
Do not copy/paste the script. It may be downloaded here but it is already installed on the target OS. Specify network id from the command line with a short command-line option -s. See next example usage.
wifini.sh -s <SSID>
The script asks for the network password to store it encrypted for future connections. Once an internet protocol (IP) address is assigned to Raspberry π network device, the SSH server by Dropbear[5] allows for secure remote login, control and file transfer.
A client is needed to transmit mails to some simple mail transfer protocol (SMTP) server. Here this functionality is powered by a compact SMTP client called msmtp[8]. To configure user email account edit <META-DIR>/thc/meta-thc/recipes-extended/msmtp/msmtp/.msmtp.conf on the host machine or ~/.msmtp.conf on the target machine. In both cases the msmtp configuration is performed on the target machine. Use the following command to run configuration functions, including generation of a security key, encryption of your password and the client configuration. Privacy is assured and security protected by GnuPG[4].
configure_mail_client
This reports the progress in the development of a custom Linux-based OS for Raspberry π[9]. The kernel version of this embedded OS is Linux release 5.15. A GUI system performance monitor application[7] is built as a part of the OS image. In addition, an SSH server provides remote connection, data transfer and device control.
As the OS is now functional, performance and real-time tests are ongoing. For precision measurements the OS has to be tested both on the target platform and on virtual HW via emulators, e.g. quick emulator (QEMU) <META-DIR>/poky/scripts/runqemu.
Erik Andersen. BusyBox. 2023. url: https://busybox.net (visited on 2023).
Omar Cornut. Dear ImGui. 2023. url: https://github.com/ocornut/imgui (visited on 2023).
Open Enbedded. OpenEmbedded. 2017. url: https://www.openembedded.org (visited on 2023).
GNU. GnuPG. 2024. url: https://www.gnupg.org (visited on 2024).
Matt Johnston. Dropbear SSH. 2023. url: https://matt.ucc.asn.au/dropbear/dropbear.html (visited on 2023).
Kaloyan Krastev. An Embedded Operating System with a Graphical System Performance Monitor on Raspberry π. 2023. url: https://kaloyanski.github.io/meta-thc/thchowto.html (visited on 2023).
Kaloyan Krastev. A Compact Graphical System Performance Monitor. 2024. url: https://kaloyansen.github.io/imgui (visited on 2024).
Martin Lambers. msmtp. 2024. url: https://marlam.de/msmtp (visited on 2023).
Raspberry π Ltd. Raspberi π. 2023. url: https://www.raspberrypi.com (visited on 2023).
Jouni Malinen. WPA Supplicant. 2013. url: https://w1.fi/wpa_supplicant (visited on 2023).
Yocto Project. Yocto Project. 2023. url: https://www.yoctoproject.org (visited on 2023).
Yocto Project. Yocto Project Quick Build. 2023. url: https://docs.yoctoproject.org/brief-yoctoprojectqs/index.html#compatible-linux-distribution (visited on 2023).
generate pdf powered by LaTeX